
Thinking about upgrading your space with a beautiful granite countertop? It’s a stunning choice but the next question often is, “Is it hard to install?” The answer: yes and no
Thinking about upgrading your space with a beautiful granite countertop? It’s a stunning choice—but the next question often is, “Is it hard to install?” The answer: yes and no. If you’re planning a kitchen countertop remodel or DIY renovation, installing granite slabs can be a real challenge unless you’re well-prepared. However, with proper tools, planning, and help, you can achieve professional-level results.
In this comprehensive guide, we’ll explore all the steps, challenges, benefits, and tips for installing granite countertops—from measuring, handling, and leveling, to finishing and maintenance.
What Is a Granite Countertop?
A granite countertop is crafted from natural stone composed of quartz, feldspar, and mica. It’s prized for its resistance to heat, scratches, and everyday wear—all with unique, high-end aesthetics. Available in countless patterns and colors, granite adds value to any home.
👉 Learn more: What Is a Granite Countertop?
Why Granite Installation Is Considered “Hard”
Weight and Handling
- Granite slabs can weigh 18–22 lbs per square foot. A standard 30 square-foot slab may exceed 600 lbs.
- Lifting slabs requires proper handling, usually with two or more people, suction grips, or lifting tools.
Precision Cutting and Fabrication
- Cuts must be precise down to a ⅛” to ensure a snug fit for sinks, cooktops, and seams.
- Errors are expensive—remedial grinding or reordering slabs is time-consuming and costly.
- Specialized countertop installation tools (straightedges, seam setters, levels, diamond blades) are required.
Substrate Preparation
- Countertops need a level and sturdy cabinet base.
- Cabinets must be shimmed and supported to prevent failure under the weight.
Seaming and Refinements
- Seams must be aligned and polished with color-matched epoxy; poor execution = visible seams.
- Custom edge profiles require time-consuming polishing to achieve a refined finish.
Pros and Cons: DIY vs Professional Install
✅ DIY Benefits
- Cost savings: Eliminating labor fees can reduce countertop costs by 20–30%.
- Flexibility: Schedule work around your own timeline.
- Satisfaction: Seeing your own hands-on work adds pride.
⚠️ DIY Challenges
- Safety risks: heavy material, sharp tools, high dust load.
- Risk of slab damage during transport or installation.
- Requires heavy setup and teardown of workspace and supports.
👉 Find out if it’s a task worth tackling: Can You Install Granite Countertops Yourself?
Step-by-Step Granite Installation Guide
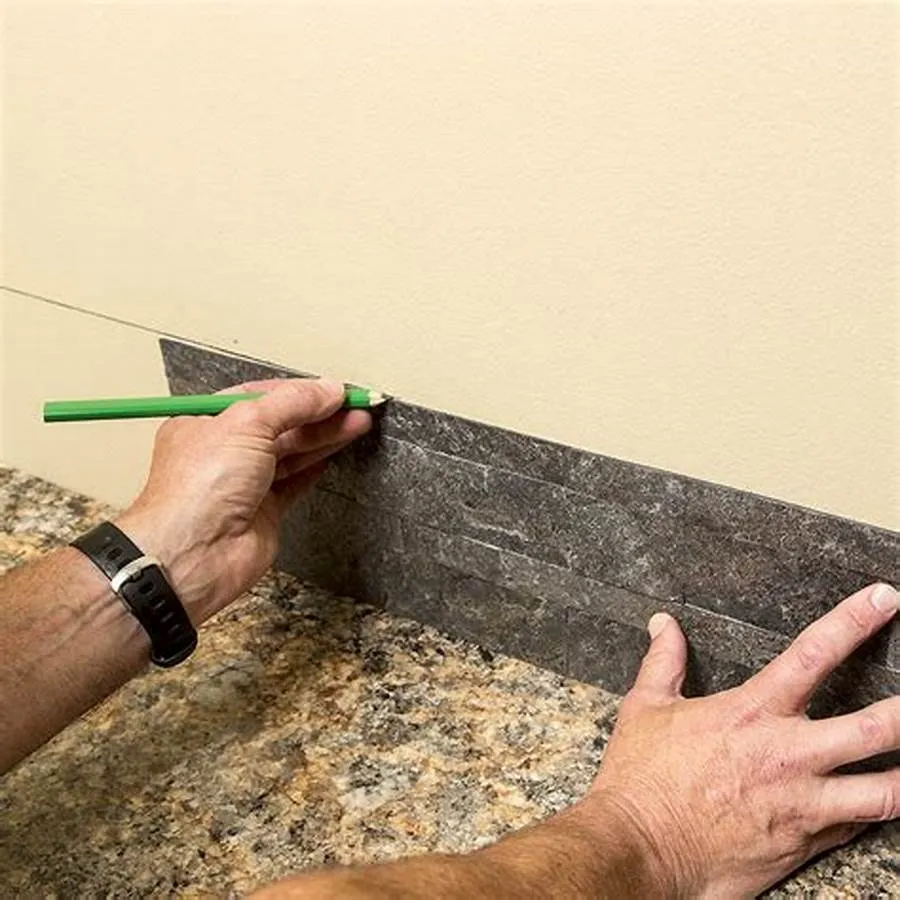
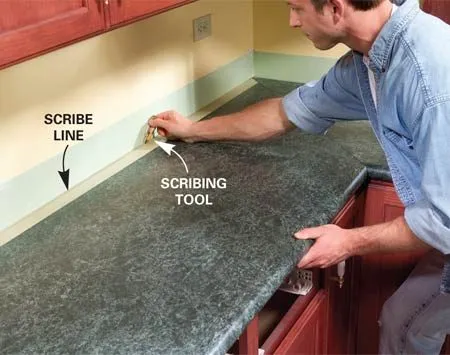
1. Measure with Precision
- Measure each countertop section, backsplash height, and cutout dimensions.
- Calculate square footage—round up by 5–10% to account for waste.
2. Order Granite Slabs
- Choose granite slab that matches your design goals—cuts should be scheduled ASAP.
- Confirm edge profiles and seam placement before fabrication.
3. Prep Cabinets and Base
- Ensure cabinets are level, shimmed, and secured to walls.
- Install sturdy backing under load-bearing zones (e.g. cooktops).
4. Dry-Fit the Slabs
- Place slabs loosely to test fit for seams, overhangs, and appliance alignment.
5. Secure Slabs Permanently
- Apply beads of silicone to cabinet frames.
- Lower slabs into place using suction lifters or handles.
- Use clamps or weights to hold slabs flat while silicone cures.
6. Seam Filling & Polishing
- Apply color-matched epoxy between slabs.
- Typically requires 24–48 hrs curing.
- Polish seams with diamond pads to achieve seamless transitions.
7. Install Edge Profiles
- Common styles: eased, beveled, ogee, bullnose.
- Highlight your design with polished edge treatments.
8. Seal the Countertop
- Apply a high-quality penetrating sealer to prevent stains/mildew.
- Usually reapplied annually or per product guidelines.
9. Final Cleanup and Inspection
- Wash the surface with stone-safe cleaner.
- Check seam integrity and caulking.
- Reconnect fixtures and appliances.
Key Considerations to Evaluate Difficulty
Equipment Requirements
- Access to a wet saw with diamond blade
- Levels, straightedges, and power tools
- Suction lifters for safe slab lifting
Skills Needed
- Comfort with power tools and careful handling
- Ability to measure and cut to exact specs
- Steady hand polishing and thoughtful seam alignment
Project Planning
- Work in dry, well-ventilated area
- Coordinate room access and temporary kitchen setups
- Have help lined up for lifting
Maintenance After Installation
- Clean daily using mild pH-neutral stone cleaners. Avoid acidic cleaners.
- Reseal regularly (6–18 months depending on usage).
- For granite countertop maintenance, follow daily cleaning routines and protect surfaces from high heat.
- Address minor chips with epoxy; for major damage, hire a professional.
Cost: DIY vs Professional
| Aspect | DIY Granite | Professional Install |
|---|---|---|
| Slab Material | $40–$90+/sq ft | $40–$90+/sq ft |
| Labor Cost | $0 | $35–$85+/sq ft |
| Tools + Consumables | $500–$1500 | Included in pros’ fee |
| Risk of Damage | Higher | Lower |
| Finish Quality | Variable | Consistent |
DIY can save money if done correctly, but poor execution may void warranties or result in repair costs.
👉 Explore typical project breakdowns: How to Demo Granite Countertops?
Alternatives to DIY Granite
If granite seems too demanding, consider:
- Quartz countertops: uniform, easy-to-install, low maintenance
👉 What Are Quartz Countertops? - Marble slabs: softer and more prone to scratches, but elegant.
👉 What Is a Marble Slab?
Final Verdict: Is It Hard?
Yes—installing granite countertops is challenging due to weight, precision, tooling, and risk. It can be done by a dedicated DIYer, but many find it more practical to hire professionals—especially for large, complex, or integrated designs.