

Installing granite countertops are a high-impact way to improve the look, function, and value of your kitchen or bathroom.
Installing granite countertops are a high-impact way to improve the look, function, and value of your kitchen or bathroom. Whether you’re updating an old vanity or completing a full kitchen remodel, granite is a standout material known for its durability, unique beauty, and timeless appeal.
This guide walks you through the essentials of how to install granite countertops in both kitchen and bathroom spaces—including tools, prep work, techniques, and post-installation care. Even if you plan to hire a professional, understanding the process helps you make smarter decisions and avoid costly mistakes.
What Is a Granite Countertop?
A granite countertop is a polished stone surface made from a natural granite slab that’s cut, shaped, and sealed for long-term use. Granite is known for its hardness, heat resistance, and wide range of granite countertop colors, making it ideal for both kitchen countertops and bathroom vanities.
👉 What Is a Granite Countertop?
Tools & Materials You’ll Need
To install granite in a kitchen or bathroom, gather the following:
- Tape measure & level
- Safety goggles & gloves
- Shims & caulk
- Silicone adhesive or epoxy
- Sealant
- Suction cups or lifting clamps
- Diamond-tipped saw (for cutting, if needed)
- Angle grinder (for fine-tuning edges)
Note: Granite is extremely heavy. Enlist help when lifting or positioning slabs—especially in kitchens where slabs are larger.
Step 1: Measure and Template the Space
Start by carefully measuring your cabinet layout. Create a full-size template using thin plywood or cardboard. This ensures the granite slab is cut precisely, especially for complex areas like:
- Sinks (undermount or drop-in)
- Faucets
- Cooktops
- Wall cutouts or backsplash integration
Professional installations often use laser templating for this phase.
Step 2: Inspect and Prepare Cabinets
Before installation:
- Check that cabinets are level and secure.
- Use a long level and place shims if needed.
- Ensure base cabinets can support the granite’s weight (about 18–25 lbs/sq. ft.).
Bathroom vanities may require 3/4″ plywood support beneath 2cm granite slabs, while 3cm granite often installs directly on the frame.
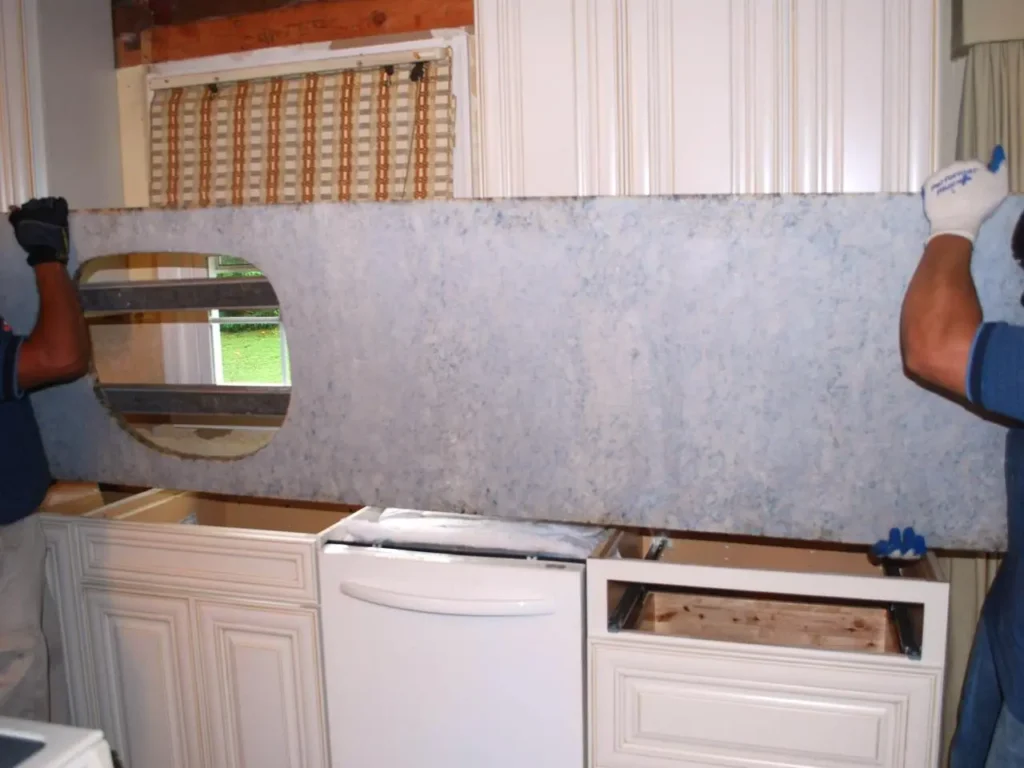
Step 3: Dry Fit the Granite Countertop
Gently place the granite on top of the cabinets or vanity to test the fit. Adjust positioning for:
- Even overhang on all sides
- Seam alignment (if more than one slab)
- Proper positioning around sink cutouts and plumbing
Use shims to eliminate gaps or dips between granite and cabinet top.
Step 4: Apply Adhesive and Set the Slab
Once fit is confirmed:
- Remove the slab and apply silicone adhesive or construction epoxy along the cabinet perimeter.
- Reposition the slab carefully using suction grips or helpers.
- Press down evenly and allow adhesive to cure (per manufacturer instructions).
- For multiple slabs, use epoxy seam joiners and clamps to pull seams tight.
In bathrooms, don’t forget to apply silicone sealant around sink rims or faucet bases to prevent leaks.
👉 How to Install Granite Countertop?
Step 5: Install Sink and Faucet (If Applicable)
If installing in a kitchen or vanity with plumbing:
- Drop-in sinks: Seal the rim with silicone and drop into the cutout.
- Undermount sinks: Attach from underneath using mounting clips or brackets before setting the granite.
Make sure the faucet holes are accessible and aligned properly.
Step 6: Caulk and Seal
Once the slab is secured:
- Caulk seams between the wall and granite countertop
- Fill any small gaps along the cabinetry
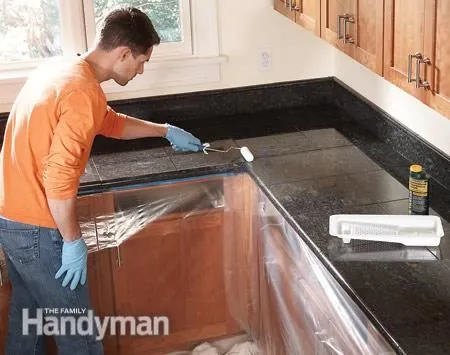
- Apply a penetrating granite sealer across the surface (unless factory sealed)
- Let sit 15–20 minutes, then buff with a clean cloth
This step protects the surface from stains and ensures long-lasting performance in both kitchens and bathrooms.
Granite Countertop Installation Tips (Kitchen vs. Bathroom)
| Feature | Kitchen | Bathroom |
|---|---|---|
| Typical slab size | 40–70 sq. ft. | 4–15 sq. ft. |
| Cutouts | Sink, cooktop, faucet | Sink, faucet |
| Cabinet reinforcement | Usually required | Often required for large vanities |
| Common finishes | Polished, leathered, honed | Polished or honed |
| Preferred slab thickness | 3 cm (no sub-top required) | 2 cm with plywood support (optional) |
👉 How Much Does It Cost to Put Granite Countertop in a Bathroom?
Granite Countertop Maintenance
Granite requires minimal care when properly sealed:
- Wipe daily with a damp cloth or pH-neutral stone cleaner
- Avoid bleach, vinegar, and harsh chemicals
- Reseal every 1–2 years to protect from stains and moisture
- Use cutting boards and trivets to preserve surface shine
Routine granite countertop cleaning helps maintain the natural polish and durability.
Granite Countertop Repair (If Needed)
Though rare, granite may need touch-ups due to:
- Chips from impact
- Scratches from improper cleaning
- Water intrusion if sealant breaks down
Most granite countertop repair can be done with:
- Epoxy kits
- Color-matched resin
- Professional refinishing
Final Thoughts
Installing a granite countertop in your kitchen or bathroom is a rewarding project that transforms the look and feel of your space. While the process can be handled by a confident DIYer, it requires precision, tools, and physical strength—especially in larger kitchens.
Whether you install it yourself or work with professionals, granite offers enduring beauty and value. Follow the right steps and maintenance routines to make your investment last a lifetime.